How to add custom CSS in asp.net c-sharp (Grid View and Pager with custom CSS in simple steps
in asp.net )
In this session we are going to see how to style a beautiful grid view by adding CSS style sheet in asp.net web application. Grid view in use to bind the data from database and show in tabular form in application.
Contents
hide
Step 1. Create a database name it Login.
Step 2. Create a data table into login database and name it Student_info.
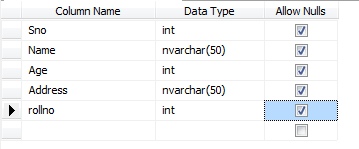
Step 3. insert data into Student_info table.
insert into Student_Info values(1,'Ravi',12,'Delhi',11)
insert into Student_Info values(2,'Alok',14,'Meerut',12)
insert into Student_Info values(3,'Raj',16,'pune',13)
insert into Student_Info values(4,'Mohit',18,'London',14)
insert into Student_Info values(5,'Piyush',20,'India',15)
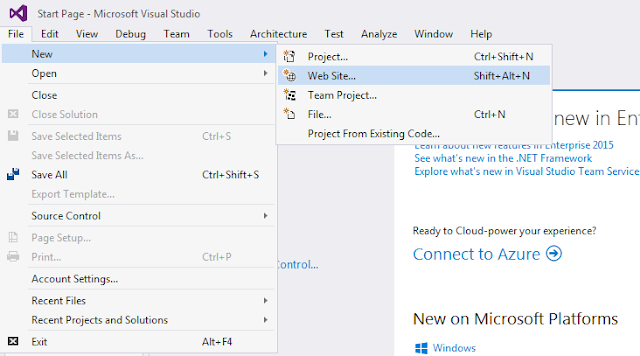
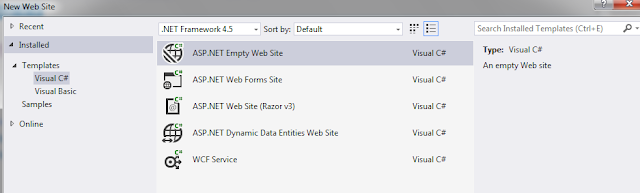
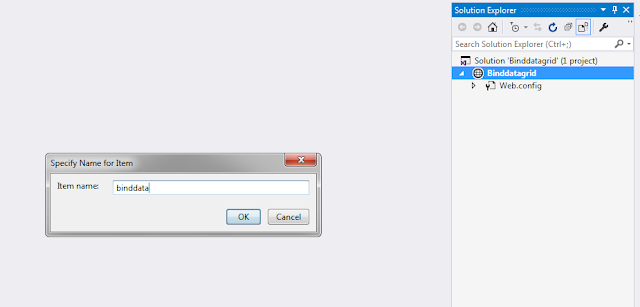
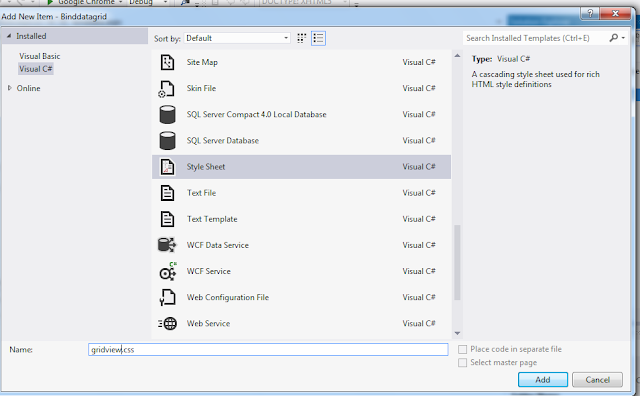
Step 4. Open visual studio and create a new web application and name it bind data grid.
|
|
| open visual studio |
Step 5. Add a web page and name it Bind data.
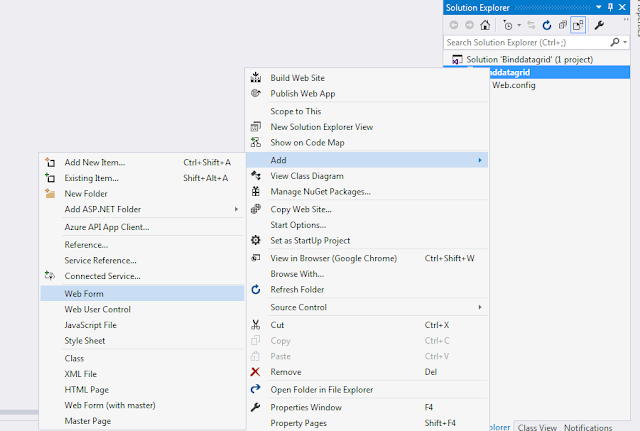
Step 6. Right click on application solution name and add a folder name it CSS.
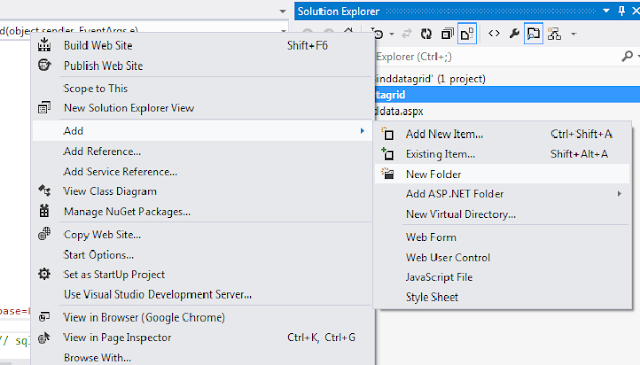
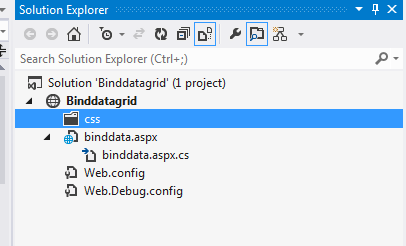
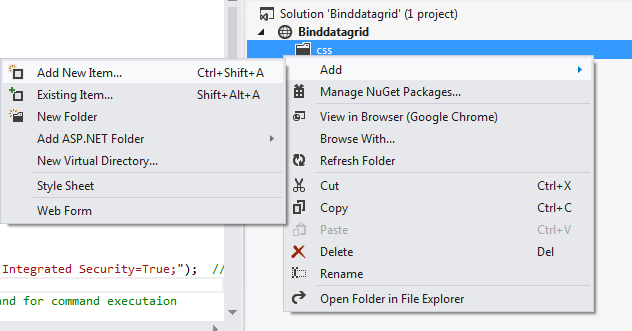
Step 7. Right click on CSS folder and add a CSS style sheet and name it grid view .
Step 8. Add code in the style sheet which is given below.
.grivdiv >DIV
{
	margin: 1em 0;
	/*width: 100%;*/
	overflow: hidden;
	background: #FFF;
	color: #024457;
	border-radius: 10px;
	border: 1px solid #167F92;
	display:table;
	border-spacing:2px;
	border-collapse:separate;
}
.grivdiv tr:nth-child(odd)
{
	background-color: #EAF3F3;

}

.grivdiv tr {
    border: 1px solid #D9E4E6;
}
	.grivdiv tr th
	{

		border: 1px solid #FFF;

    padding: 1em;
	display: table-cell;
    text-align: center;
	margin: .5em 1em;

	}

	.grivdiv tr td
	{

  color: #024457!important;
    color: #FFF;
    padding: 5px;
	display: table-cell;
    text-align: center;
	}


.GridPager:hover
{
	background-color:white!important;
}

.GridPager a,
.GridPager span {
    display: inline-block;
    padding: 3px 9px;
    margin: 4px auto;
    border-radius: 3px;
    border: solid 1px #08515f;
    background: #167f92;
    box-shadow: inset 0px 1px 0px rgba(255,255,255, .8), 0px 1px 3px rgba(0,0,0, .1);
    font-size: .875em;
    font-weight: bold;
    text-decoration: none;
    color: #ffffff;
    text-shadow: 0px 1px 0px rgba(255,255,255, 1);
	font-weight: 600;
}

.GridPager a {
   background-color: #f5f5f5;
    color: #167f92;
    border: 1px solid #167f92;
}

.GridPager span {

    background:  #167f92;
    box-shadow: inset 0px 0px 8px rgba(0,0,0, .5), 0px 1px 0px rgba(255,255,255, .8);
    color: #f0f0f0;
    text-shadow: 0px 0px 3px rgba(0,0,0, .5);
    border: 1px solid #08515f;
}

.GridPager td
{
	border: 1px solid #ddd;
     padding: 4px;
	 background-color:#f2f2f2!important;
}
.GridPager table tr td
{
background-color: #EAF3F3!important;
}


        .card [class*=card-header-]:not(.card-header-icon):not(.card-header-text):not(.card-header-image) {
    border-radius: 3px;
    margin-top: -20px;
    padding: 15px;
}
        .card .card-header-warning .card-icon, .card .card-header-warning .card-text, .card .card-header-warning:not(.card-header-icon):not(.card-header-text) {
    box-shadow: 0 4px 20px 0 rgba(0,0,0,.14), 0 7px 10px -5px rgba(255,152,0,.4);
}
        .card.bg-warning, .card .card-header-warning .card-icon, .card .card-header-warning .card-text, .card .card-header-warning:not(.card-header-icon):not(.card-header-text), .card.card-rotate.bg-warning .back, .card.card-rotate.bg-warning .front {
  background: linear-gradient(60deg,#4e718d,#1f6195);
}

        card [class*=card-header-] {
    margin: 0 15px;
    padding: 0;
    position: relative;
}
.card .card-header {
    z-index: 3!important;
}

.card {
    position: relative;
    display: flex;
    flex-direction: column;
    min-width: 0;
    word-wrap: break-word;
    background-color: #fff;
    background-clip: border-box;
    border: 1px solid #eee;
    border-radius: .25rem;
}
.card {
    font-size: .875rem;
    margin-top:35px;
}

        .card-header {

            margin-left:10px;
            margin-right:10px;
        }
       .table > tbody > tr > th, .table > tfoot > tr > th, .table > thead > tr > td, .table > tbody > tr > td, .table > tfoot > tr > td {

    vertical-align: middle;

}
       .card .body {
    font-size: 13px;
    color: #555;
    padding: 20px;
}
Step 9. Add given below code in web form design side .
<%@ Page Language="C#" AutoEventWireup="true" CodeFile="binddata.aspx.cs" Inherits="binddata" %>

<!DOCTYPE html>

<html xmlns="http://www.w3.org/1999/xhtml">
<head runat="server">
    <title></title>

    <link href="css/gridview.css" rel="stylesheet" />
</head>
<body>
    <form id="form1" runat="server">
     <div class="card">

               <div class="header card-header card-header-warning">
                   <h2 style="color:white;">Student Info</h2>

               </div>


               <div class="body">


                   <div class="table-responsive">

<div class="dataTables_wrapper form-inline dt-bootstrap">
        <asp:GridView ID="GridView1" runat="server" CssClass="grivdiv" Width="100%" PagerStyle-CssClass="GridPager" PageSize="2" AllowPaging="true" PagerSettings-Mode="NumericFirstLast" PagerSettings-FirstPageText="First" PagerSettings-LastPageText="Last" PagerSettings-NextPageText=">>" PagerSettings-PreviousPageText="<<" PagerSettings-PageButtonCount="5">


        </asp:GridView>
   </div>
                       </div>
                   </div>

         </div>
    </form>
</body>
</html>
Note :- Please insure add ccs style sheet into web page head tag like given below.
<link href="css/gridview.css" rel="stylesheet" />Step 10. Add given below code inside the web form code behind file.
using System;
using System.Collections.Generic;
using System.Linq;
using System.Web;
using System.Web.UI;
using System.Web.UI.WebControls;


using System.Data;
using System.Data.SqlClient;

public partial class binddata : System.Web.UI.Page
{
    protected void Page_Load(object sender, EventArgs e)
    {
        if (!IsPostBack)
        {
        DataTable dt = new DataTable();
        SqlConnection con= new SqlConnection(@"Server=.;Database=Login; Integrated Security=True;");  // connectio string for connect to database
        String patt = "select * from Student_info ";
                SqlCommand cmd = new SqlCommand(patt, con); // sql command for command executaion

                SqlDataAdapter da = new SqlDataAdapter(cmd); // dataadapter set of table
                dt = new DataTable();
                da.Fill(dt); // fill method use to fill data table from set of table

                GridView1.DataSource = dt;
                GridView1.DataBind();


        }
    }

}
Result :- Now run your application and your grid view style is same as given below.
 |
| styling grid view |